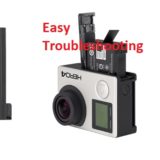
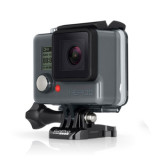
How to Make a GoPro Time Lapse
Tips for Creating a Professional-looking Time Lapse
Some of the coolest videos online are time lapses. These videos are pieces of footage that have been filmed in a long period of time, then sped up in order to create an amazing visual experience for the viewer. Cool things that people having time lapsed in the past are all very great for home movies – international flights and fun day trips to the beach are all great ideas. More fun things that can be put in a time lapse fashion are also road trips across the country, or a timelapse of a highway throughout the night.
Anyway, the actual process in which you make a time lapse is quite easy. One of my first time lapses was a road trip from the West Coast all the way to Missouri. It was pretty cool, and I had a filmmaker friend there the entire time to teach me how to do things. These two tips that he showed me along the way were not only easy to follow, but also improved my videos dramatically.
Make Sure the Camera Doesn’t Move
This might be a bit obvious, but cameras moving can absolutely kill a time lapse. At times the camera even moving a bit can suddenly alter the entire view of the time lapse halfway through. It’s not fun having to go back and redo hours of filming just because wind tipped the camera a bit, or it got disturbed.
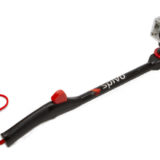
The best way that I found fixed this is by getting a really good mount – this helped me during my road trip timelapse because it didn’t require too much attention. All I really had to do was switch the battery every once in a while. However, I find that for general purpose time lapses you’d be better off getting a tripod. Make sure that the tripod you’re getting is quite heavy. Although this might be a pain, it really helps you gain a sense of security knowing that the camera won’t move.
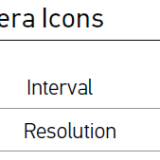
Intervals Are Everything
I suppose that the only thing worse than realizing your camera tipped over halfway through the film would be the realization that everything is going too fast. In your time lapse settings, you can choose the interval at which your camera will take pictures at, whether it be a picture every 3 seconds, or a picture every 20 or 30 seconds. Obviously these intervals will vary depending on what you’re filming, but I’d say that you should take pictures more frequently if you’re filming fast things, such as a busy city time lapse. For time-lapses at a slower pace, such as clouds going over a landscape, I’d say take the pictures at a slower rate. Every 5-10 seconds would be good for clouds, depending on the speed at which they’re floating at.
Battery Life
For those of you who are interested in doing long-term time-lapses, I’d say that investing in another battery would be a very wise choice. These allow you to simply set an alarm and instantly recharge the camera. For those of you who are doing time-lapses at night, there are fun things you can do while waiting to replace the camera battery. One time with my friends we all had a campfire and talked in the wee hours of the morning waiting between charging sessions. It can be a fun thing to do with your friends as well as a necessity for longer time-lapses.
So those are my tips for making time-lapses! I’m pretty new to the whole movie-making thing relatively speaking, but these tips worked for me, and they’ll work for you too!